XP Start Menu Not Working

Wednesday, July 16, 2014

XP Start Menu Not Working:
The windows start menu is one of the more convenient features of the windows operating system. The start menu is divided into three parts divide by separation lines as shown below.
The part on the left above the line are program that will always be shown on the menu unless you manually remove them as shown below from the list and are called ‘pinned’ items.
The programs below that line are added as you open new programs. If you want to add one of them permanently, put the cursor on the icon and hold down the left mouse button and drag the icon above the line.
The All Programs selection is located under the last separator. Putting your mouse over the ALL Programs option produces a list of all the programs that are available on the start menu.
Unfortunately, sometimes the start menu stops working.

What Causes the Start Menu To Stop Working?

There can be several causes for this problem, but the most common causes are:
  1. Corrupt or missing operating system files
  2. Damaged registry keys
  3. Virus or spyware infection

How to Fix the Start Menu Not Working Problem

The repair depaends on the cause of the problem.
Corrupt or missing operating system files
  1. Use the following steps to repair the problems:

    Press Ctrl + Alt + Del or right click anywhere on the task bar to open the Task Manager.

    Select File -> New task(run) as shown
  2. type cmd in the dialogue box and then press Enter.
  3. At the Command Prompt window, type the sfc /scannow and press Enter.

    Insert the Windows XP installation disk in the CD/DVD drive if prompted.
The System File Checker will detect and try to fix or replace missing or corrupt operating system files.
Corrupted Registry Key
To fix a corrupted you need to use a good registry cleaner that has the ability to repair corrupted entries. In fact you should clean your registry as part of a regular maintenance program.
Virus or Spyware infection
Run and anti-virus and anti-spyware program to do a complete scan of your computer and eliminate all threats.

Summary

I would perform these repairs in the following order:
  1. Do the anti-virus and spy-ware scan and if that doesn’t fix it
  2. Repair the system files and if that doesn’t fix it
  3. Clean the registry. Even if one of the first two steps eliminates the problem, you should still run a good registry cleaner to optimize your operating system performance.

Related Searches

  • windows xp start menu not working (87)
  • start menu not working xp (77)
  • windows xp start button not working (73)
  • start button not working windows xp (69)
  • start button not working xp (52)
  • start menu not working (46)
  • xp start menu not working (40)
  • repair start menu xp (38)
  • windows xp start button not responding (30)
  • start menu not working windows xp (28)
  • repair XP start menu (25)
  • win xp start button not working (21)
  • start menu is not working in windows xp (18)
  • xp start button not working (18)
  • start menu corrupted xp (17)
  • start menu not responding (16)
  • windows start button not working xp (16)
  • repair start menu (15)
  • start button is not working in windows xp (15)
  • Windows XP start menu not responding (15)
Read More..

What is Kernel Memory Corruption

What is Kernel Memory Corruption?:
If you have ever experienced the blur screen of death, then you have most likely been a victim of kernel memory corruption. Figuring out what happened is almost like solving a crime. The bad guy did the damage and is long gone leaving you to clean up the mess and salvage whatever you can salvage.
As we discussed before, kernel memory corruption can be caused by either hardware of software problems but it is usually the result of a poor quality or incorrect device driver. There are several tools available to help diagnose and repair these problems.
Let’s look at the memory architecture so you can understand what is actually happening in that mysterious memory world where the players are like ghosts that you know are there but never really can see.
Most drivers run in high memory in either the paged or non paged memory pool. A pool is just a block of addresses reserved for a specific purpose. Data residing in paged memory may be ion the RAM or it may on the hard drive in the memory swap file. Data residing in non-paged memory is always in the RAM. The picture below shows the allocation table for a block of memory.

Of course this picture means nothing to most people.
Each row is a bock of memory that has been allocated to specific data. Notice the last one is marked as free which means any application that is allowed to write to this part of the memory can use this block for its data. Each block is marked with an four character identifier called a tag that and the size of the data. The memory manager uses this information to find the requested data.
The most common error caused by poor driver software is for the program to write to it allocated block and then write to the next block overwriting data that belongs to someone else which causes an immediate crash With the stop error code similar to STOP 0×0000001e
If the memory manager tried to read the memory location later, it will probably crash with one of the following error codes:

Bug Check 0×19: BAD_POOL_HEADER
Bug Check 0xC2: BAD_POOL_CALLER

Windows 7 has added a guard page that is similar to the guard bands used in digital transmission. It is a small area of memory that no process can write to so that if a faulty driver overflows its memory block, the system won’t crash.

How to fix the Problem

There are tools that can go in and remove bad data, mark bad sectors in RAM “bad” so no process attempts to write to them. For the professional these are a good investment but for the rest of us. A hard reboot, which means a complete shutdown, should clear all memory blocks. If it doesn’t then there is some other problem with the memory.
As cheap as memory is today, it makes more sense to take your RAM chips to a dealer and have them tested. If they have any bad blocks, replace them.
After you install your new memory, run a good registry cleaner, cleanup and then defrag your hard drive. Next update all of the hardware drivers to the latest versions and your computer should run good as new.
Read More..

Acer Aspire 4820G Windows XP Driver

Tuesday, July 15, 2014

Chipset :
Acer Aspire 4820tg Chipset Driver
Chipset_Intel_9.1.1.1025.Zip
Download

MEI :

Intel Management Interfacemei_6.0.0.1179.Zip
Download

Intel Turbo Boost :
Intel_Turbo_Boost_1.0.1.1002.Rar
Download

VGA Driver :
    1) AMD
        Vga_Amd_8.741.0.0000xp.Rar
        Download

   2) Intel
       Vga_Intel_6.14.10.5294.Rar
       Download

Card Reader :

Alcor Card Reader Driver
Download

Audio :
Realtek Audio Driver
Download

Bluetooth :
Broadcom Bluetooth Driver
Download

Touchpad :
Synaptics Touchpad Driver
Download

Lan/Ethernet :
Atheros Ethernet Driver
Download

Wireless :
Atheros Wireless Lan Driver
Download

Webcam :
       1) Chicony Webcam Driver
           Camera_Chicony_V5.8.33.402_Xpx86_A.Zip
           Download 

       2) Suyin Webcam Driver
           Camera_Suyin_V5.8.48.501_Xpx86_A.Zip
           Download

Launch Manager :
Launchmanager_Dritek_4.0.12.Zip
Download

SATA AHCI Driver :
Intel SATA AHCI Driver
Download

Read More..

Intel 845 VGA Driver for windows 7

Note :
Starting with the Intel® 945 Express Chipset families, Intel makes available generic versions of the Intel graphics driver for Windows 7 OS. You can choose not to use the validated driver from your computer manufacturer and install an Intel generic driver. Generic drivers are available from the Intel Download Center. If you encounter a problem while using the generic driver, Intel recommends reinstalling the validated driver from your computer manufacturer.

VGA Driver - Download HERE
Read More..

Intel 82852 82855 GM GME Windows 7 Driver

Monday, July 14, 2014

Requirement : 
1) Administrator Account User
2) Driver - See Download Link given below
3) Have Winrar or Winzip to extract downloaded driver.

Note : This guide is compiled by Lexxion, Full edit by Black-x, Revised and re-edit by ME.

This guide will be divide into several part to simplify the content to make sure that it straight to the point to avoid misconception and confusion. Enjoy!

Part 1 : Download + Extract Required Driver

1) Download : 
Intel(R) Graphics Controller 6.14.10.3722 (Windows)
Download - Mediafire Links
Download - Alternatives Links


2) To make our life easier, create a Folder at your Desktop and name it INTEL GRAPHIC
    ACCELERATOR. 
    Right Click on Desktop > New > Folder
    2.1) Copy and Paste the driver that youve downloaded earlier into this Folder that youve created.
    2.2) Now, Right Click on the Intel_6_14_10_3722.zip files that you paste in the Folder > Extract Here.
    2.3) Remember where you put the Extracted driver files(Remember the directory).

Part 2 : Uninstall Current Driver (Skip this if you never
              installed any VGA driver)
1) Open Device Manager. (Windows Button + R and type "devmgmt.msc" and press Enter.
2) If you already installed a driver before and the installation failed, you should see Yellow "!" on the  VGA
    Driver name. 
3) You need to uninstall this failed driver. Right Click on it > Uninstall.
4) Restart PC / Laptop.
Part 3 : EDIT c:windowssystem32driversvgapnp.sys
1) Run CMD (Windows Button + R then type "cmd" and press enter). You can do this if you are
    using administrator account. If youre not sure, Click Start(Windows Button on Taskbar) > type "cmd" 
    on the search bar. Command Prompt should list up on your Start Menu. Right Click on CMD
    and choose "Run as Administrator".

Refer picture below
 
2. Type command below in the command prompt windows :
    Note : <space> on the command line below means you press Space key on your keyboard 1 time. :)
takeown<space>/f<space>c:windowssystem32driversvgapnp.sys

3. Press Enter after your type the command at Step 2. Should be success...

4. Then type this line without the<space>:
  cacls<space>c:windowssystem32driversvgapnp.sys<space>/G<space>xXx:F

Please be reminded : xXx must be replace with your Computer Name.
Press Windows Button > you can see your computer name below the profile picture for your account.

5) After you type the command in Step 4(Already replace xXx with your Computer Name), press enter then it will ask you to press "y" to confirm. 

Part 4 : EDIT c:windowssystem32driversvgapnp.sys
1) Open c:windowssystem32driversvgapnp.sys right click and select open or open with.

  
2) Choose second option on the radio button "select program from a list of installed programs "


3. Select Notepad

4. Just add any character to the beginning of the text. Lets say we will add character x . So the text should
    start with xMZ and the rest of stuff. Save the file. This edit will render that file unusable.
Example :  
Before :


After :


Part 5 : Uninstall Current Driver
1) Open Device Manager (Windows Button + R then type "devmgmt.msc"


2) In Device Manager uninstall Standard VGA Adapter.


3) It will prompt you to restart - Restart.

4) After restart you will see a message saying that certain devices did NOT installed 
     successfully(Dont Worry).
5) Go to Device Manager and you should see the exclamation point next to "Video Controller" and "Video
    Controller (vga compatible)". Right-click on "video controller (vga compatible)" and SELECT update
    driver.

6) Choose "Browse my computer for the Driver Software" .


7. Then select browse:


 8. This is the steps where you need to find your extracted file back in Part 1 which is why I asked you to
     remember the path.


9) Wait for the driver to be installed. It might hang for a little (It will say that window is "not responding"). Do
    not worry as this is still installing the driver. It will prompt you to restart so do it. (If it does not prompt click
    anywhere and wait for message). After restart it will finish installing the driver.

10) Open c:windowssystem32driversvgapnp.sys in any text editor. Remove the first character you put
      there which was x. Save the file. it should look like this before saving it (MZ - ignore other character)


Your file will be usuable again :). You can stop here if you want, but if you want to restore the permissions for the file to original state:

Right-click on any other file in the c:windowssystem32drivers. Choose "Properties". Go to "Security" tab. Now compare that security tab with the security tab of c:windowssystem32driversvgapnp.sys. Just make sure the security tabs of those two files look the same (all tabs and advanced options). In order to add "TrustedInstaller" it is not the same as regular usernames because it is a service.
You will need to type "NT SERVICETrustedInstaller" (without quotes) when adding it to own the file and to have all permissions. Once you done editing you can delete your account from c:windowssystem32driversvgapnp.sys, because it was not there from the beginning. We took control over and the previous commands added it by default. 
Finish! 

Related Post :

Credits : 
Lexxion for the compilation of this guide
Black-x for full edit
Read More..

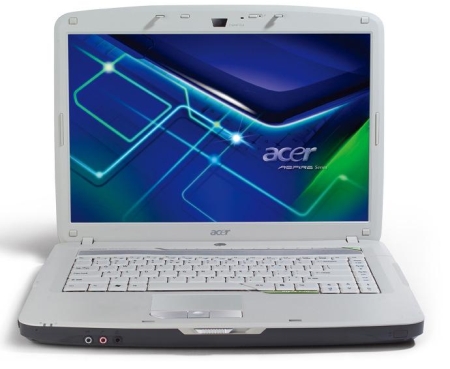
Acer Aspire 9800 Laptop Manual

Are you stuck with your Acer Aspire 9800 laptop? Try to find our free manual to help you. With our free PDF Acer Aspire 9800 manual you can dive right in to the technical and usability aspects of the Acer Aspire 9800 laptop.

 Laptop Manual

If you have found problems to download the manual for Acer Aspire 9800 laptop, feel free to email us and we will try to send you a working link to download the manual for Acer Aspire 9800 laptop as soon as posible.

Download Link For Acer Aspire 9800 Laptop Manual

Download Acer Aspire 9800 Laptop Manual

Read More..

Asus Eee PC 1015PEM BLK133S Laptop Manual

Sunday, July 13, 2014

You can download Asus Eee PC 1015PEM-BLK133S laptop manual free. Follow the link below to download the user manual, otherwise known as repair manual for the laptop or technical guide for Asus Eee PC 1015PEM-BLK133S laptop or PDF manual.

 Laptop Manual

If you have found problems to download the manual for Asus Eee PC 1015PEM-BLK133S laptop, feel free to email us and we will try to send you a working link to download the manual for Asus Eee PC 1015PEM-BLK133S laptop as soon as posible.

Download Link For Asus Eee PC 1015PEM-BLK133S Laptop Manual

Download Asus Eee PC 1015PEM-BLK133S Laptop Manual

Read More..